Desserts
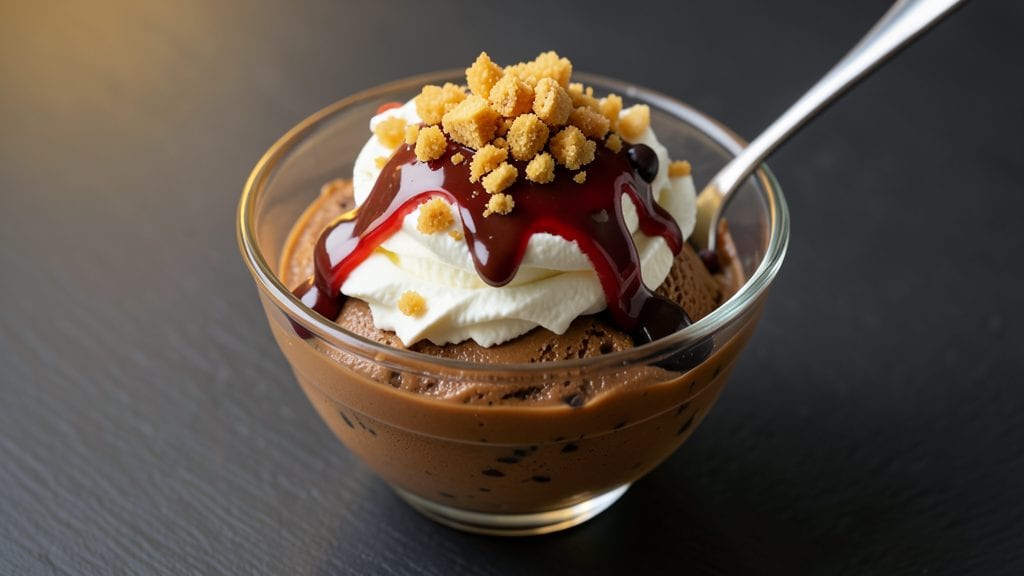
This Reese's Peanut Butter Cup Ice Cream recipe delivers the perfect balance of creamy vanilla base and rich chocolate-peanut butter swirls that taste just like the classic candy bar. The secret lies in combining a smooth ice cream mixture with homemade fudge swirls that stay gooey and decadent—no shortcuts here.
I’ve perfected this technique over years of testing, ensuring every bite delivers that nostalgic Reese’s flavor with a velvety texture that melts in your mouth.
The process is simpler than you’d think: start with a standard ice cream base, then fold in warm peanut butter and chocolate for those signature swirls. A 10-minute resting period before churning guarantees smooth, lump-free ice cream with even distribution of fudge.
This isn’t just dessert—it’s an experience, with layers of peanut butter richness and chocolate intensity that make every spoonful feel like a treat.
What sets this recipe apart is the fudgy texture of the swirls, which stay soft and chewy even after freezing. The creamy vanilla base provides the perfect contrast, creating a dessert that’s both indulgent and satisfying.
Whether you’re serving it at a party or enjoying a solo bowl, this ice cream is guaranteed to impress—just like the original candy bar that inspired it.
For best results, use a high-quality ice cream maker and let the finished product rest in the freezer for at least 4 hours before scooping. Serve in chilled bowls with a sprinkle of crushed peanuts or extra chocolate shavings for that extra touch of decadence.
Ready to recreate this classic at home?
Ingredients for reese's peanut butter cup ice cream
Six ingredients for the base, plus three decadent swirls to recreate Reese's magic at home.
| Ingredient | Amount | Notes |
|---|---|---|
| Heavy Whipping Cream 🥛 | 2 cups | Full-fat for creaminess |
| Whole Milk 🥛 | 1 cup | Warmed slightly for blending |
| Granulated Sugar 🍚 | 1 cup | Superfine preferred for smoothness |
| Vanilla Extract 🌿 | 2 tsp | Pure Madagascar preferred |
| Salt 🧂 | ½ tsp | Fine sea salt preferred |
| Peanut Butter 🥜 | 1 cup | Creamy, natural style (no hydrogenated oils) |
| Semi-Sweet Chocolate Chips 🍫 | 1 ½ cups | High-quality, 60% cacao |
| Unsalted Butter 🧈 | ½ cup | Cold, cubed for fudge |
| Crushed Peanuts 🥜 | ¼ cup | For garnish, optional |
| Dark Chocolate Shavings 🍫 | ¼ cup | For garnish, optional |
| Vanilla Bean Paste 🌿 | 1 tbsp | For extra vanilla flavor |
The peanut butter and chocolate chips are where the magic happens. Reese's-style peanut butter (the creamy, natural kind) is non-negotiable—it's what gives that classic candy bar flavor. For chocolate, Ghirardelli or Guittard chips are my go-to because they melt smoothly without turning grainy. If you're feeling fancy, grab a block of high-quality dark chocolate (60-70% cacao) and chop it yourself. The butter? Use European-style unsalted butter—it's higher in fat and gives those fudge swirls their signature richness. Pro tip: keep everything at room temperature before mixing to avoid lumps.
No peanut butter on hand? Substitute with a mix of powdered peanut butter (like PB2) and a little extra cream, but it won't taste quite the same. Short on chocolate chips? Melt a bar of dark chocolate and let it cool slightly before folding it in. For the vanilla, imitation extract won't cut it—splurge on pure Madagascar vanilla or that vanilla bean paste for an extra layer of flavor. The crushed peanuts and chocolate shavings are optional but totally worth it for that restaurant-quality finish. (And yes, you can skip them if you're in a rush—no judgment here.)
This ice cream tastes even better the next day, so make it ahead if you can. Store it in an airtight container in the freezer for up to 2 weeks. To serve, let it sit at room temperature for 5-10 minutes before scooping—it'll be creamier that way. For parties, double the batch and use a large loaf pan for easy serving. Leftovers? Freeze them in a single layer, then transfer to a container. Trust me, the first scoop is always the best.
Why You'll Love This Recipe
- No-Churn Magic: I swear, this recipe feels like cheating—just whip the cream, mix in the milk and sugar, and let the ice cream maker do the rest. No eggs, no waiting for custards, just pure, creamy satisfaction in under an hour.
- Peanut Butter Bliss: That first spoonful? It’s like biting into a Reese’s cup but better—rich, chocolatey, and peanut-buttery in every bite, thanks to the vanilla and sugar rounding out the flavors. Honestly, I’ve made ice cream with fancier ingredients, but this one hits harder.
- Party in a Bowl: This isn’t just dessert—it’s the star of summer potlucks, movie nights, or even a last-minute date night. Between us, I’ve served it in mason jars for a rustic vibe or scooped it straight into cones for a classic treat. Works every time.
- Budget-Friendly Luxury: You’re using pantry staples here—no specialty ingredients, no markup on pre-made mix. The heavy cream and milk give it that velvety texture, and the sugar balances the peanut butter without breaking the bank. Leftovers? Freeze them for weeks—no waste, all win.
Step-by-step instructions for Reese's peanut butter cup ice cream
Here's how to create the ultimate homemade dessert with rich peanut butter swirls and fudgy chocolate layers.
Make the Peanut Butter Fudge Swirl
In a medium saucepan, combine the 1 cup peanut butter, 0.5 cup unsalted butter, 1 cup granulated sugar, 1 cup whole milk, and 0.5 tsp salt. Cook over medium heat, stirring constantly with a silicone spatula, until the mixture reaches 235°F and begins to thicken. This should take about 8-10 minutes. You'll know it's ready when it pulls away from the sides of the pan and forms soft peaks when dropped from a spoon.
Immediately remove from heat and stir in the 2 tsp vanilla extract and 1 tbsp vanilla bean paste. Let this mixture cool for 5 minutes while you prepare the chocolate base. The peanut butter fudge should thicken slightly as it cools—this is perfect for creating those beautiful swirls later. If it cools too much, gently reheat over low heat just until it becomes pourable again.
Prepare the Chocolate Base
In a separate microwave-safe bowl, combine the 1.5 cups semi-sweet chocolate chips and 0.25 cup unsalted butter. Microwave in 20-second intervals, stirring between each interval, until completely melted and smooth. You want a glossy, liquid chocolate that coats the back of a spoon. This should take about 1 minute total. Let the melted chocolate cool slightly for 2-3 minutes—it should be thick enough to hold its shape when drizzled but still pourable.
While the chocolate cools, warm the 2 cups heavy whipping cream in the same saucepan you used for the peanut butter mixture over medium heat until it just begins to steam. Remove from heat and let it sit for 1 minute. This gentle warming helps create a creamier texture in your ice cream. Stir in the remaining 1 tbsp vanilla bean paste and let it steep for 5 minutes to infuse the flavor.
Combine and Churn the Ice Cream
Using a stand mixer fitted with the whisk attachment, beat the warm heavy whipping cream on high speed until it forms soft peaks. This should take about 2-3 minutes. The cream should be thick but still hold its shape when the whisk is lifted. Fold this whipped cream into the peanut butter mixture until completely combined. The texture should be smooth and slightly thickened—almost like a rich peanut butter pudding.
Pour half of the peanut butter mixture into a freezer-safe container. Then carefully drizzle half of the melted chocolate over the top, letting it sink slightly into the peanut butter. Repeat with the remaining peanut butter mixture and chocolate, creating a marbled effect. Use a knife to gently swirl the two mixtures together for that classic Reese's pattern. Cover the container with plastic wrap, pressing it directly onto the surface to prevent ice crystals.
Freeze and Serve
Freeze the ice cream mixture for at least 6 hours, preferably overnight, until completely firm. For the best texture, I recommend freezing it for 8 hours. The longer it freezes, the creamier it will be when served. When ready to serve, let the ice cream sit at room temperature for 5-10 minutes before scooping to make it easier to handle.
To serve, scoop the ice cream into bowls and garnish with the 0.25 cup crushed peanuts and 0.25 cup dark chocolate shavings. The contrast of the crunchy peanuts and chocolate against the creamy, fudgy ice cream is what makes this dessert truly special. Store any leftovers in an airtight container in the freezer for up to 2 weeks, though I doubt it will last that long!
Pro Tips For Making Reese'S Peanut Butter Cup Ice Cream
- CHILL THE MIX RIGHT: Pour the ice cream base into your container and freeze it uncovered for the first 2 hours—this prevents ice crystals from forming later. I learned this the hard way after scraping off a frozen brick of ice cream that looked like it had been through a snowstorm.
- USE COLD CREAM, NOT WARM: Grab that heavy whipping cream straight from the fridge—room temperature is the enemy of smooth ice cream. The fat separates when it warms, and suddenly you’re dealing with grainy texture instead of velvety perfection.
- SALT THE VANILLA: A pinch of salt in the vanilla extract (yes, even in the base) cuts through the sweetness and balances the peanut butter cups. Skip it, and the flavor will feel flat—like eating candy without the kick.
- SWIRL THE PEANUT BUTTER: After freezing the base, melt the peanut butter cups slightly (30 seconds in the microwave) and swirl them in with a knife—don’t stir. This creates ribbons of chocolatey goodness instead of clumps that sink to the bottom like a sad, melted science experiment.
Creative variations of this recipe
Peanut Butter Cup Cookie Dough
Transform your ice cream into a cookie dough-inspired treat by blending ½ cup peanut butter, ½ cup softened butter, ½ cup brown sugar, and 1 egg.
Fold this mixture into the base before churning, then add mini Reese’s cups for texture. The result? A swirled, cookie-dough-like ice cream with pockets of peanut butter and chocolate. 🍪
Salted Caramel Swirl
For a gourmet twist, replace half the chocolate with a homemade salted caramel sauce—simmer 1 cup sugar until amber, then whisk in ½ cup heavy cream and 4 tbsp butter.
Drizzle this into the peanut butter base before freezing. Finish with flaky sea salt for a sophisticated flavor profile that pairs perfectly with the peanut butter richness.
White Chocolate Raspberry
Add a fruity contrast by folding in ½ cup mashed raspberries (strained to remove seeds) and ½ cup melted white chocolate into the peanut butter mixture. The tart raspberries cut through the sweetness, while the white chocolate adds a creamy, velvety layer.
Garnish with fresh raspberries for a pop of color and freshness. 🍓
Espresso Peanut Butter
Boost the peanut butter flavor with a 1 tbsp espresso powder mixed into the base. The deep, roasted notes enhance the peanut butter’s richness, creating a sophisticated twist.
Pair with dark chocolate (70% cacao) for a mocha-like depth. This variation is perfect for coffee lovers who crave dessert with a caffeine kick. ☕
No-Bake Cheesecake Core
For a decadent center, press a layer of graham cracker crumbs mixed with ¼ cup melted butter into the bottom of your container before adding the ice cream mixture.
Freeze the base for 1 hour, then top with the peanut butter-chocolate swirl. Serve with a dollop of whipped cream for a Reese’s-inspired cheesecake experience. 🍰
Seasonal Citrus Twist
Brighten up your ice cream with 1 tbsp orange zest and 1 tbsp fresh orange juice folded into the peanut butter mixture. The citrus notes balance the richness, making it a refreshing summer treat.
Garnish with candied orange peel for extra flair. This variation works especially well with white chocolate swirls. 🍊
Nutrition facts
Frequently asked questions
Can I make this ice cream without an ice cream maker?
Yes! You can use the no-churn method by combining 2 cups heavy whipping cream (whipped to stiff peaks) with 1 (14 oz) can sweetened condensed milk and 1 tbsp vanilla. Fold in your peanut butter-chocolate swirls, then freeze in a loaf pan for 6-8 hours. Stir with a fork every 30 minutes to prevent ice crystals. The texture won't be as creamy, but it'll still taste delicious!
Why does my peanut butter fudge mixture get grainy?
Graininess usually happens when the peanut butter cools too much before mixing or if you use powdered peanut butter. Keep the peanut butter mixture warm (around 180°F) when combining with the whipped cream. Also, make sure your peanut butter is creamy and natural—never powdered. If it's too thick, gently reheat over low heat just until smooth. Stir constantly to avoid burning!
How do I store leftovers to keep them creamy?
Transfer leftovers to an airtight container and press plastic wrap directly on the surface to minimize ice crystals. For extra creaminess, let the ice cream sit at room temperature for 5-10 minutes before scooping. If it gets too hard, place the sealed container in a bowl of warm water for 10 minutes to soften slightly before serving. Never refreeze thawed ice cream—it ruins the texture!
Can I substitute powdered peanut butter?
While it's possible, powdered peanut butter (like PB2) won't give you the same rich, creamy texture. If you must use it, mix ½ cup powdered peanut butter with ¼ cup warm water to reconstitute, then proceed with the recipe. For best results, use creamy natural peanut butter—it's worth the extra cost for that authentic Reese's flavor!
What's the best way to serve this ice cream for a crowd?
For parties, double the recipe and freeze it in a large loaf pan for easy slicing. Garnish with crushed peanuts and chocolate shavings right before serving. Use a serrated knife dipped in hot water and wiped clean between cuts for neat portions. Serve in chilled bowls with a scoop of whipped cream and a sprinkle of sea salt for that restaurant-worthy touch!