Desserts
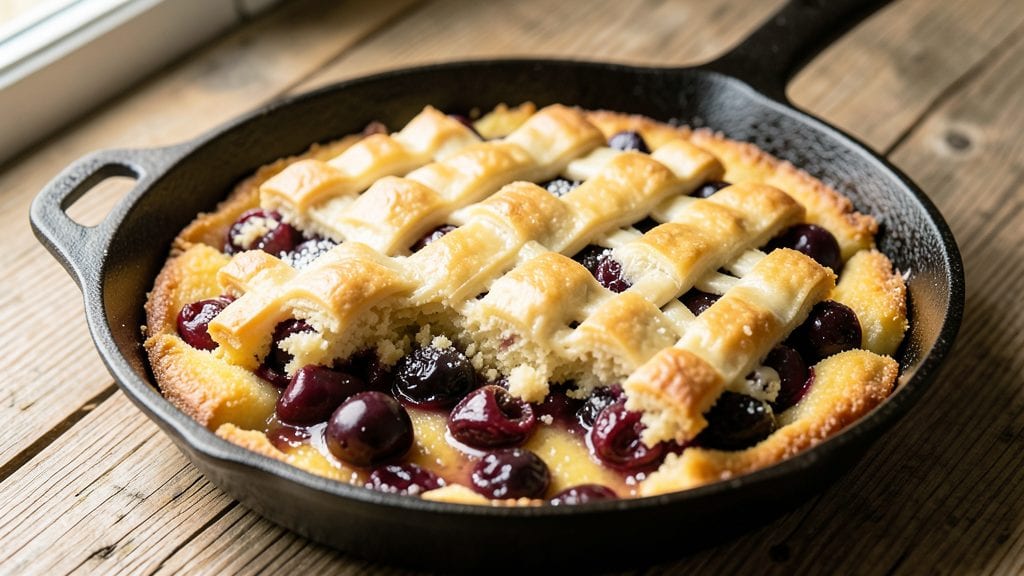
This easy cherry cobbler recipe with canned cherries and cake mix proves dessert doesn’t have to be complicated—just delicious. ✨ The beauty of this recipe lies in its simplicity: a single bowl, minimal prep, and ingredients you likely already have in your pantry.
I developed it during a busy weekend when I needed a foolproof dessert that would impress without stress.
The secret to this cobbler’s success is balancing the sweet-tart flavor of canned cherries with the rich, buttery texture of a cake-mix crust. No need for pie dough or complicated layering—just dump, mix, and bake.
The result is a warm, bubbling dessert with a golden crust and juicy filling that’s perfect straight from the oven or chilled for later.
What makes this recipe truly special is how it transforms basic ingredients into something restaurant-worthy with almost no effort. The cherries caramelize slightly during baking, creating pockets of sweetness, while the cake-mix crust stays tender and flaky.
It’s the kind of dessert that feels indulgent but is actually easy to make.
Serve it warm with a scoop of vanilla ice cream or a dollop of whipped cream for the ultimate comfort dessert. Ready in under an hour, this cobbler is perfect for family dinners, potlucks, or satisfying a sudden sweet tooth. Let’s get baking!
Ingredients for easy cherry cobbler recipe with canned cherries and cake mix
Six simple pantry staples transform into a showstopping cobbler in under an hour—no fancy skills required!
| Ingredient | Amount | Notes |
|---|---|---|
| Canned Dark Sweet Cherries 🍒 | 2 cups | With juice, drained slightly |
| Yellow Cake Mix 🍰 | 1 box | 15.25 oz box (standard size) |
| Unsalted Butter 🧈 | ¾ cup | Cold, cubed for crust |
| Granulated Sugar 🍚 | ½ cup | For extra sweetness |
| All-Purpose Flour 🌾 | ½ cup | For thicker crust |
| Large Eggs 🥚 | 2 whole | Room temperature |
| Milk 🥛 | ½ cup | Whole milk preferred |
| Vanilla Extract 🌸 | 1 tbsp | Pure extract, not imitation |
| Baking Powder 🍞 | 1 tsp | Ensures fluffy crust |
| Salt 🧂 | ½ tsp | Kosher or sea salt |
| Vanilla Ice Cream 🍦 | 2 cups | For serving (optional) |
The cake mix is the secret weapon here—Betty Crocker or Duncan Hines are my go-tos, but any yellow box works. Grab the 15.25 oz size at Walmart or Target for consistency. For cherries, Muir Glen or Del Monte are my favorites—they hold up best during baking. The canned juice adds moisture, so don't drain it completely. Pro tip: Check the can for any added sugar—some brands sweeten the cherries extra, and you might want to adjust the granulated sugar accordingly.
No cake mix? Boxed muffin mix or even pancake mix works in a pinch—just add an extra egg for structure. Ran out of butter? Coconut oil or shortening keeps the crust flaky, but butter gives that classic richness. The vanilla extract can be swapped for vanilla bean paste if you're feeling fancy. For a boozy twist, add 1 tbsp bourbon or brandy to the filling. The ice cream is totally optional, but Ben & Jerry's Cherry Garcia takes this cobbler to the next level—no judgment if you skip it though!
This cobbler reheats beautifully—just 30 seconds in the microwave with a splash of milk to revive the crust. Store leftovers in an airtight container for 3-4 days in the fridge, or freeze for up to 3 months. I always make a double batch because it disappears faster than you'd think. The filling stays juicy for days, while the crust stays crisp if you reheat it properly. Perfect for meal prep—just grab a portion and pop it in the microwave when dessert cravings hit!
Why You'll Love This Recipe
- No Pantry Dive Needed: I swear by this recipe because it uses what’s already lurking in most kitchens—no special trips to the store. Canned cherries, a box of cake mix, butter, sugar, and flour? That’s it. Honestly, I’ve made this three times in a row when I forgot to buy fresh fruit, and no one ever knew the difference.
- Buttery Cherry Bliss: The moment that crispy top meets the warm, juicy cherries? Pure magic. The cake mix gives it that tender crumb, while the sugar-butter topping turns golden and crackly—like a hug from your grandma’s kitchen. (Yes, even on a Tuesday night.)
- Weeknight Crowd-Pleaser: This is my go-to for game nights, potlucks, or when my kids beg for dessert after soccer practice. Serve it warm with vanilla ice cream, or let it cool for a no-fuss breakfast the next day. Between us, I’ve even packed leftovers for lunch—trust me, it’s still delicious cold.
- Budget-Friendly Magic: A single can of cherries and a box of cake mix stretch farther than you’d think. I make this for four people and still have leftovers that vanish in minutes. Plus, the ingredients cost less than half of what a fancy bakery dessert would—without sacrificing that oh-so-satisfying taste.
Step-by-step instructions for easy cherry cobbler
This one-bowl wonder comes together faster than you can say "dessert time!"
🍳 Step 1: Prep the Cherries and Mix the Batter
Drain the 2 cups canned dark sweet cherries (keep a little juice—about ¼ cup) and spread them evenly in the bottom of a 9x13-inch baking dish. This creates your fruity base that'll soak up all that delicious cobbler magic.
In a large bowl, mix the 1 box yellow cake mix, 0.5 cup granulated sugar, 0.5 cup all-purpose flour, 1 tsp baking powder, and 0.5 tsp salt until completely combined. This is your shortcut to a perfect crust—no measuring dry ingredients separately! In a separate small bowl, whisk together the 2 whole large eggs, 0.5 cup milk, 1 tbsp vanilla extract, and the reserved ¼ cup cherry juice. Pour the wet ingredients into the dry and stir just until mixed—don't overdo it or your cobbler will be tough.
👨🍳 Step 2: Cut in the Butter for a Flaky Crust
Add the 0.75 cup cold cubed unsalted butter to the batter and use a pastry cutter or your fingers to work it in until pea-sized lumps remain. This is where the magic happens—the butter creates those beautiful flaky layers in your crust. The key here is to keep everything cold so the butter doesn't melt before it hits the oven.
Scoop about ⅔ of the batter over the cherries in the baking dish, spreading it evenly with a spatula. The rest will form your crust on top. Here's the thing—don't worry about making it perfect. A slightly uneven top crust just makes it look more rustic and delicious!
🔥 Step 3: Bake Until Golden and Bubbly
Preheat your oven to 350°F while you finish assembling. Sprinkle the remaining ⅓ of the batter over the cherries, then use a fork to create a crisscross pattern on top. This not only looks pretty but helps create those signature cobbler peaks.
Bake for 45-50 minutes until the top is deep golden brown and the edges are pulling away from the pan. You'll know it's done when you see bubbles forming and the crust looks set. The cherries should be bubbling up through the crust—this is your sign of perfection! If it's browning too fast, tent loosely with foil after 30 minutes to prevent over-browning.
⏰ Step 4: Rest and Serve Warm
Remove from the oven and let the cobbler rest for 10 minutes before serving. This gives the juices time to settle and makes cutting easier. I know it's tempting to dig in immediately, but trust me—waiting ensures every bite is juicy and delicious.
Serve warm with 2 cups vanilla ice cream on the side for scooping. The warm cobbler will melt the ice cream beautifully, creating that perfect contrast of hot and cold. If you're feeling fancy, dust with powdered sugar or serve with whipped cream. This dessert is so easy, it'll make you feel like a baking pro!
Pro Tips For Making Easy Cherry Cobbler Recipe With Canned Cherries And Cake Mix
- Drain Cherries Well: I learned this the hard way—skipping this step turns your cobbler into a soggy mess. After opening the can, dump cherries into a colander and let them drain for 5 minutes, then blot the syrup off with a paper towel. The extra moisture in the filling makes the cake mix turn out dense instead of tender.
- Pre-Bake the Topping: Sounds weird, but it works: spread the cake mix topping on the cherries before baking, then bake it uncovered for 10 minutes at 375°F. This sets the edges so they stay crispy, not gummy. After that, pour in the cherries and syrup, then finish baking—your cobbler will have a proper crust, not a sad, mushy lid.
- Use Cold Butter: Cut that butter straight from the fridge and cut it into small cubes—don’t even think about softening it. Cold butter creates flaky layers in the topping that melt into pockets of richness. If you use warm butter, you’ll end up with a dense, greasy crust that sticks to the pan like glue.
- Skip the Extra Sugar: The cake mix already has sugar, and the canned cherries are dripping in syrup. Adding extra granulated sugar to the filling makes it cloyingly sweet. Trust the recipe’s balance—your taste buds will thank you when the flavors sing instead of clash. (Yes, even if you’re impatient like me.)
Troubleshooting this dish
Underbaked Crust Fix
If your crust turns out pale and doughy instead of golden brown, your oven temperature might be too low or the batter wasn't hot enough when it went in. First, check your oven with an oven thermometer—many home ovens run 25°F lower than set.
If confirmed, increase the temperature to 375°F next time. For immediate fixes, broil the cobbler for 2-3 minutes at the end (watch closely to avoid burning) or sprinkle 1 tbsp granulated sugar on top and return to the oven for 5 minutes. 🔥
Soggy Bottom
A soggy bottom happens when excess cherry juice pools at the base instead of absorbing into the crust. To prevent this, pat the drained cherries dry with a paper towel before arranging them in the pan. Also, spread them in a single even layer—don't pile them high.
If your cobbler already has a soggy bottom, invert it onto a plate to serve, or sprinkle 2 tbsp quick-cooking tapioca on the cherries before adding the batter to thicken the juices. The tapioca will absorb moisture without altering flavor.
Lumpy Top Texture
Lumpy tops usually mean the batter wasn't mixed enough or the butter was too warm when added. To fix this, mix the batter just until combined—overmixing develops gluten and makes the crust tough.
For next time, chill the butter for 20 minutes before cutting it into the batter to maintain cold lumps. If your cobbler already has lumps, serve it as-is! The texture contrasts nicely with the juicy filling, and the uneven peaks create perfect ice cream scooping spots.
Filling Too Watery
If the cherries release too much juice and the filling looks watery, the issue is likely undercooked filling or over-drained cherries. First, ensure you reserve ¼ cup cherry juice when draining—this adds moisture to the batter.
For future bakes, reduce the baking time by 5 minutes and check for doneness at 40 minutes. If the filling is still too wet, sprinkle 1 tbsp cornstarch mixed with 1 tbsp sugar over the cherries before adding the batter. This will thicken the juices as it bakes. 💡
Burnt Edges
Burnt edges are a common issue in sheet pans, but a simple fix prevents them: parchment paper. Line your 9x13-inch baking dish with parchment before adding the cherries—this creates a barrier that prevents sticking and burning.
If your cobbler already has burnt edges, cover the sides with aluminum foil after 30 minutes of baking. For extra insurance, place the dish on the middle rack instead of the top, where heat concentrates more intensely.
Crust Too Dense
A dense crust often results from overmixing the batter or using too much flour. To lighten it, fold in the butter last and work it in gently with a fork or your fingers until pea-sized lumps remain.
For future attempts, reduce the flour to ¼ cup and add ½ tsp more baking powder for lift. If your crust is already dense, serve it warm with a scoop of vanilla ice cream—the cold contrast makes it more palatable. The filling's juiciness will still shine through! ✨
Nutrition facts
Frequently asked questions
Can I use frozen cherries instead of canned?
Yes, but you'll need to thaw and drain them first. Spread 2 cups frozen cherries on a paper towel to absorb excess moisture, then proceed with the recipe. The texture will be slightly firmer than canned cherries, but the flavor remains delicious. For best results, don't skip draining—excess liquid can make the filling watery.
How do I make this cobbler gluten-free?
Swap the yellow cake mix for a 1:1 gluten-free baking mix and use gluten-free all-purpose flour instead of regular flour. The recipe will still work, though the crust may be slightly crumbly. Test with a trusted gluten-free brand like Bob's Red Mill for best results.
What's the best way to store leftovers?
Keep it in an airtight container in the fridge for 3-4 days or freeze for up to 3 months. To reheat, cover with foil and bake at 350°F for 15 minutes or microwave for 30 seconds with a splash of milk to revive the crust. The filling stays juicy even after storage!
Can I use white cake mix instead?
Technically yes, but the flavor will be subtly different. White cake mix lacks the warm, caramel notes of yellow cake, which complement the cherries beautifully. If you must use white, add 1 tbsp cinnamon to the batter to enhance the fruit's flavor. For best results, stick with yellow cake mix.
Why does my cobbler have a raw center?
This usually happens when the oven isn't hot enough or the cobbler is underbaked. Check your oven temperature with a thermometer—many run 25°F low. For future bakes, increase to 375°F and bake for 5-10 minutes longer. If already baked, broil for 2 minutes to finish the center.