Main Courses
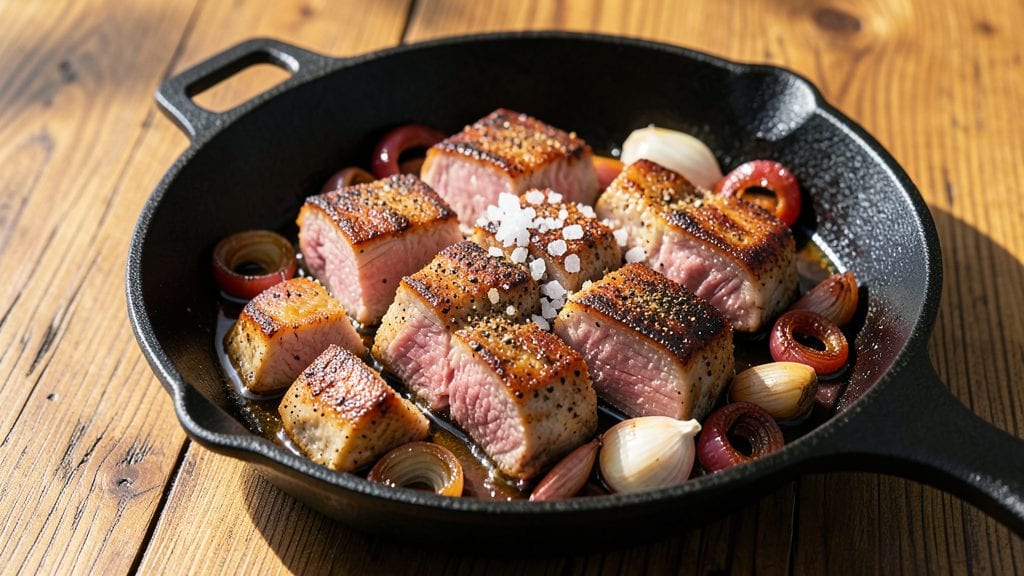
Transforming tough cuts of pork into tender, fall-apart boneless Boston butt is an art I’ve perfected through precise temperature control and slow-cooking techniques. This recipe delivers restaurant-quality pulled pork without the excess fat, making it ideal for weeknight dinners or meal prep.
The secret lies in a well-balanced rub, consistent heat, and patience—no shortcuts here.
Unlike traditional smoked pork shoulder, this method focuses on leaner cuts trimmed of excess fat, ensuring juicy results without the mess. You’ll need just 3 hours of active cooking time (plus resting), and the process is straightforward: season, slow-cook, shred, and serve.
The key is maintaining a steady 250°F internal temperature to break down the meat gently while preserving moisture.
By the end, you’ll have perfectly shredded pork that’s tender enough to eat with a fork, infused with smoky, savory flavors. The texture is unmatched—no dryness, no toughness—just melt-in-your-mouth perfection. Serve it on buns with tangy coleslaw or over rice for a hearty meal that’s both satisfying and foolproof.
This recipe isn’t just about the pork; it’s about mastering the technique. Whether you’re feeding a crowd or meal prepping for the week, the results are consistently delicious. Let’s get started—your taste buds will thank you.
Ingredients for boneless boston butt
Lean pork, bold spices, and slow heat transform tough meat into melt-in-your-mouth perfection.
| Ingredient | Amount | Notes |
|---|---|---|
| Boneless Boston Butt Pork Roast 🥩 | 3 lb | Trimmed of excess fat, cut into 2-inch chunks |
| Yellow Onion 🧅 | 1 whole | Large, roughly chopped |
| Garlic Cloves 🧄 | 6 cloves | Fresh, peeled and smashed |
| Smoked Paprika 🌶️ | 2 tbsp | High-quality for smoky depth |
| Ground Black Pepper 🌶️ | 1 ½ tsp | Freshly cracked for sharpness |
| Diamond Crystal Kosher Salt 🧂 | 1 ½ tsp | For balanced seasoning |
| Brown Sugar 🍯 | 1 tbsp | Lightly packed for caramelization |
| Apple Cider Vinegar 🍎 | 1 tbsp | For tangy brightness |
| Extra-Virgin Olive Oil 🫒 | 2 tbsp | For even coating |
| Fresh Thyme Leaves 🌿 | ¼ cup | Chopped, stems removed |
| Apple Juice 🍏 | 1 cup | Unsweetened for moisture |
| Beef Broth 🥫 | 1 cup | Low-sodium for balance |
| Honey 🍯 | 1 tbsp | Wildflower for floral notes |
The pork is everything here—boneless Boston butt trims fat while keeping moisture locked in. Look for cuts labeled 'lean' at Whole Foods or your butcher shop—they’ll have it pre-trimmed, but if not, grab a sharp knife and trim any visible fat cap yourself. The apple juice and beef broth combo keeps things juicy without overpowering the pork’s natural flavor. I always buy organic pork when possible, but conventional works fine if it’s fresh. For the rub, smoked paprika is non-negotiable—it’s what gives that authentic barbecue vibe without needing a smoker.
No smoked paprika? Half a teaspoon of liquid smoke in the broth works in a pinch, but it’s not the same. Running short on thyme? Dried thyme at one-third the amount gets you close, but fresh is worth hunting down at Trader Joe’s or the farmers market. The apple cider vinegar can be swapped for red wine vinegar if that’s what’s open, but the tang is key. For the apple juice, unsweetened works best—skip the fancy hard cider unless you’re feeling adventurous. And if you’ve got pork tenderloin instead of Boston butt? It’ll cook faster, so adjust your timing—just don’t skip the slow cook.
This pork reheats like a dream—3-4 days in the fridge, 3 months frozen. I portion it into meal-prep containers with a little extra broth for reheating. For leftovers, store in an airtight container with a paper towel pressed on top to absorb any moisture. The rub? Make a double batch—it keeps for 6 months in an airtight jar, perfect for future projects. And if you’re feeding a crowd, just double the pork and broth—same technique, same results.
Why You'll Love This Recipe
- One-Pan Magic: I swear by this—just toss the boneless butt, sliced onions, and minced garlic on a sheet pan, sprinkle that smoked paprika, and let the oven do the work. No pots, no pans, no stress.
- Smoky Deep Flavor: That boneless butt stays juicy while the edges caramelize, and the smoked paprika? It adds this warm, earthy punch that makes every bite feel like a hug. Honestly, the garlic and onions melt into the meat, creating this rich, savory sauce right on the pan.
- Weeknight & Meal Prep Hero: Between us, this is my go-to for busy nights—ready in under an hour, and it’s perfect for meal prep. Pack it for lunches or freeze portions; the flavor only gets better after a day or two.
- Budget-Friendly Feast: A single boneless butt feeds a crowd, and the ingredients? Basic, affordable, and packed with flavor. I’ve made this for game days, family dinners, and even a lazy Sunday—no one ever complains about leftovers.
Step-by-step instructions for slow-cooked boneless Boston butt
Here's how to transform your boneless pork into melt-in-your-mouth perfection with minimal effort.
Prepare the Pork with Dry Rub
Begin by trimming any remaining fat from the 3 lb boneless boston butt pork roast and cutting it into 2-inch chunks. The goal is to expose more surface area for even cooking and maximum flavor penetration. Pat the chunks dry with paper towels—this step is crucial for developing that beautiful crust later.
In a small bowl, combine the 2 tbsp smoked paprika, 1.5 tsp ground black pepper, 1.5 tsp diamond crystal kosher salt, and 1 tbsp brown sugar. This blend creates a perfect balance of smoky warmth, sharpness, and subtle sweetness. Rub this mixture all over the pork chunks, pressing it into the meat so it adheres well. Let the seasoned pork rest at room temperature for 30 minutes while you prepare the aromatics.
Sear the Pork for Depth of Flavor
Heat a large Dutch oven over medium-high heat and add the 2 tbsp extra-virgin olive oil. Once the oil shimmers (about 2 minutes), add half of the pork chunks in a single layer. Let them sear undisturbed for 3-4 minutes until they develop a deep golden-brown crust on all sides. This initial searing locks in juices and builds complex flavors through the Maillard reaction.
Transfer the seared pork to a plate and repeat with the remaining chunks. Don't overcrowd the pan—this ensures proper browning. Once all pieces are seared, reduce the heat to medium and add the 1 whole yellow onion (roughly chopped) and 6 cloves garlic (peeled and smashed). Cook for 3-4 minutes until the onion softens and the garlic becomes fragrant—this forms the aromatic base for your dish.
Build the Slow-Cooked Sauce
Return all the seared pork to the Dutch oven along with the cooked onions and garlic. Pour in the 1 cup apple juice and 1 cup beef broth, scraping up any browned bits from the bottom of the pot. Add the 0.25 cup fresh thyme leaves, 1 tbsp apple cider vinegar, and 1 tbsp honey. Stir everything together gently—you want the pork to remain submerged but not disturbed too much.
The vinegar and honey create a beautiful balance—bright acidity cuts through the richness while the honey adds subtle sweetness that caramelizes during cooking. Bring the mixture to a simmer, then cover the pot with a tight-fitting lid. This setup creates a steamy environment that gently cooks the pork without drying it out.
Cook Low and Slow Until Tender
Transfer the Dutch oven to a preheated 325°F oven and cook for 3 to 3.5 hours. The key here is patience—slow cooking breaks down the connective tissue, transforming tough meat into fork-tender perfection. Check the internal temperature after 3 hours using a meat thermometer; it should read 203-205°F at its thickest point. If it's not there yet, return it to the oven for another 20-30 minutes.
During the last 30 minutes of cooking, you'll notice the sauce reduces and thickens slightly. This creates a beautiful glaze that coats each piece of pork. If the sauce starts to evaporate too much, add a splash of water or beef broth to maintain moisture. The pork should pull apart easily with two forks when done.
Rest and Serve with Pan Sauce
Remove the pork from the oven and transfer it to a serving platter. Tent loosely with foil and let it rest for 15-20 minutes. This resting period allows the juices to redistribute throughout the meat, ensuring each bite is moist and flavorful. The pork should be fork-tender with a beautiful caramelized exterior from the slow cooking process.
Meanwhile, return the Dutch oven to the stovetop over medium heat. Let the sauce reduce for another 5 minutes until it reaches your desired consistency—it should coat the back of a spoon. Taste and adjust seasoning if needed, then spoon this rich, aromatic sauce over the pork before serving. The combination of smoky paprika, sweet honey, and tangy vinegar creates a sauce that complements the tender pork perfectly.
Pro Tips For Making Boneless Boston Butt
- USE A MEAT THERMOMETER: I learned this the hard way—guessing doneness with boneless pork leads to dry, overcooked meat. Aim for 195°F internal temp (yes, it’ll pull back to 185°F while resting), and don’t cut into it until then. That’s where the magic happens.
- MINCE THOSE GARLIC CLOVES: Whole garlic cloves? They’ll just sit there like decorative rocks. Smash them flat with the side of your knife first, then mince finely—this releases more flavor into the pan. (I know, I know, it’s extra work, but your roast will taste it.)
- DON’T SKIP THE CRUST: Pat that boneless butt bone-dry before searing, then hit it with a hot, oiled pan for 3-4 minutes per side until deep golden brown. That crust locks in juices better than any foil tent ever could. (Your future self will curse you if you skip this.)
- SAUTÉ THE ONIONS FIRST: Cook the onions and garlic in the same pan until they’re soft and caramelized (about 8-10 minutes) before adding the pork. The residual fond sticks to the meat during roasting, adding depth. (This isn’t the prettiest method, but it’s the tastiest.)
Best sauces and condiments for this dish
Classic BBQ Sauce
Start with a tangy-sweet sauce like St. Louis-style BBQ sauce—its balance of molasses, vinegar, and spices pairs perfectly with the smoky depth of your pork.
I like Sweet Baby Ray’s Original for its classic flavor, but for a homemade version, blend ½ cup ketchup, ¼ cup apple cider vinegar, 2 tbsp brown sugar, 1 tbsp smoked paprika, and 1 tsp garlic powder.
Simmer for 10 minutes until thickened, then brush generously over the pork during the last 30 minutes of cooking. 🍯
Creamy Horseradish Sauce
For a bold, creamy contrast, whip up a horseradish cream sauce that cuts through the richness. Mix ½ cup sour cream, 2 tbsp prepared horseradish, 1 tbsp Dijon mustard, 1 tsp apple cider vinegar, and a pinch of salt.
Serve as a dip for pulled pork sandwiches or drizzle over the top for a spicy kick. This sauce works especially well if you prefer a sharper, less sweet profile. 🌶️
Apple Cider Glaze
Elevate your dish with a caramelized apple cider glaze that mirrors the flavors in your recipe. Simmer 1 cup apple cider with 2 tbsp brown sugar and 1 tsp cinnamon until reduced by half (10-12 minutes).
Brush this glossy, fruity glaze over the pork during the final 20 minutes of cooking. The natural sweetness enhances the pork’s tenderness without overpowering it. ✨
Spicy Peach BBQ Jam
For a sweet-and-spicy twist, try a peach BBQ jam that adds vibrant color and heat. Blend 1 cup peach jam, 2 tbsp BBQ sauce, 1 tbsp hot sauce (like Frank’s RedHot), and ½ tsp cayenne pepper until smooth.
Spoon this jam over the pork or use it as a glaze for extra depth. This jam is especially great for summer BBQs or when you want a fruity contrast. 🍑
Garlic-Herb Butter
A simple garlic-herb butter adds richness and a fresh finish. Mix ½ cup softened butter, 2 minced garlic cloves, 1 tbsp chopped fresh parsley, ½ tsp smoked paprika, and a pinch of salt.
Dollop small pats of this butter over the pork during the last 10 minutes of cooking, or serve it on the side for dipping. The butter melts into the meat, creating a luxurious texture. 🧈
Pickled Onion Topping
Brighten every bite with quick-pickled red onions. Thinly slice 1 red onion and toss with ½ cup apple cider vinegar, 1 tbsp sugar, and ½ tsp salt**. Let sit for 20 minutes before draining.
Scatter these tangy onions over the pork or mix them into the sauce. The acidity balances the richness and adds a refreshing crunch. 🧅
Nutrition facts
Frequently asked questions
Why should I use boneless pork instead of traditional bone-in Boston butt?
The boneless cut eliminates the need to remove a bone mid-cook and reduces cooking time slightly. It also makes shredding easier and creates a cleaner presentation. The fat trimming ensures juicier meat without excess grease, while still delivering that signature pulled pork texture. For a crowd, boneless is more efficient to serve too!
Can I cook this in a slow cooker instead of the oven?
Transfer the seared pork and sauce to a slow cooker and cook on Low for 8 hours or High for 5-6 hours. The internal temperature should reach 203-205°F. Just add ½ cup broth if the sauce gets too dry during cooking. The slow cooker method is perfect for hands-off prep!
How do I know when the pork is fully tender?
Use a meat thermometer to check the thickest part of the pork—it should read 203-205°F. The meat should also pull apart easily with two forks. If it's not quite there, return it to the oven for another 20-30 minutes. Overcooking can dry it out, so don't rush this step!
What's the best way to store leftovers?
Let the pork cool completely, then store it in an airtight container with a paper towel pressed on top to absorb moisture. It keeps well in the fridge for 3-4 days or freezes for 3 months. For reheating, warm in a skillet with a splash of broth or microwave with a damp paper towel for 1-2 minutes.
Can I make this ahead of time for a party?
This recipe is perfect for meal prep! Cook the pork 1-2 days ahead and store as directed. Reheat gently before serving. For parties, assemble sandwiches or serving bowls the day of—just keep the pork and sauce separate until ready to serve. The flavors actually improve after resting overnight!