Main Courses
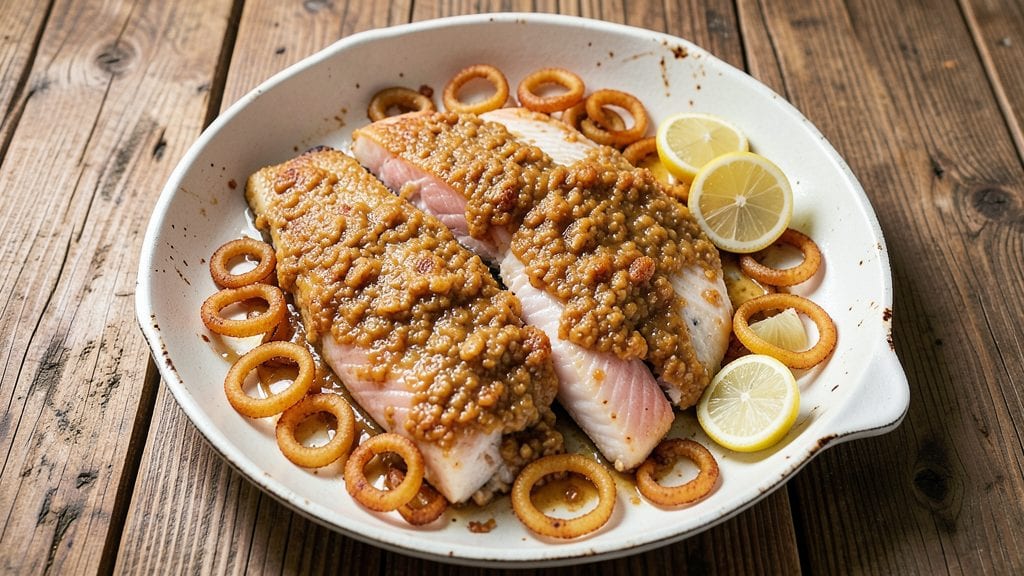
This Andy's Fish Fry copycat recipe delivers the same legendary crispy beer-battered fish and tangy dill dip you crave—now you can recreate it at home with restaurant-quality results. The secret lies in the perfect batter-to-fish ratio and precise frying temperature, both of which I’ve perfected after countless batches.
What sets this apart is the authentic Southern flair, from the golden, shatteringly crispy exterior to the tender, flaky fish inside.
We’re talking about a complete meal experience: beer-battered cod or haddock (your choice), served with classic sides like creamy coleslaw and golden hushpuppies—all made from scratch.
The batter gets its signature crunch from a blend of cold beer and buttermilk, while the dill dip balances tangy and creamy notes just like the original. This isn’t just a fish fry; it’s a full Southern-style feast that’ll have your guests asking for seconds.
The key to success? High heat for the frying (375°F) and a foolproof batter that stays light yet crispy. You’ll need about 30 minutes of active prep time, but the results—juicy, perfectly fried fish with that iconic crunch—are worth every minute.
The sides come together just as easily, so you’ll have a table full of Southern comfort food without the wait.
Serve this copycat masterpiece for game day, family gatherings, or a cozy night in—it’s that good. The beer batter adds a subtle maltiness that pairs perfectly with the bright, herby dill dip, making every bite a taste of Andy’s. Let’s get cooking!
Ingredients for andy's fish fry copycat
Crispy fish, tangy dip, and Southern sides—just 17 ingredients for Andy's magic.
| Ingredient | Amount | Notes |
|---|---|---|
| Fresh Cod Fillets 🐟 | 1 ½ lb | Skin-on, cut into 1-inch pieces |
| Fresh Haddock Fillets 🐟 | 1 ½ lb | Skin-on, cut into 1-inch pieces |
| All-Purpose Flour 🌾 | 2 cups | White, for light batter |
| Cold Lager Beer 🍺 | 1 cup | Light, like Bud Light or Coors |
| Buttermilk 🥛 | 1 cup | Full-fat for best texture |
| Large Eggs 🥚 | 2 whole | Room temperature |
| Vegetable Oil 🫒 | 4 cups | For deep frying (peanut oil preferred) |
| Fresh Dill 🌿 | ½ cup | Chopped, stems removed |
| Mayonnaise 🥫 | 1 cup | Full-fat preferred |
| Sour Cream 🧀 | ½ cup | Full-fat for creaminess |
| Lemon Juice 🍋 | 2 tbsp | Freshly squeezed |
| Salt 🧂 | 1 ½ tsp | Kosher or sea salt |
| Ground Black Pepper 🌶️ | ½ tsp | Freshly ground |
| Cornmeal 🌽 | ½ cup | For hushpuppies |
| Shredded Cabbage 🥬 | 2 cups | Green or purple |
| Mayonnaise (for coleslaw) 🥫 | ½ cup | Same brand as dip |
| White Vinegar 🍶 | 2 tbsp | For coleslaw tang |
The fish is the star, so pick cod or haddock—both stay flaky when fried. Skin-on keeps it together better. Most seafood counters sell pre-cut fillets, but if buying whole, ask for skin-on portions. Trader Joe's or Whole Foods usually have the freshest options. For the beer batter, light lager works best—Bud Light or Coors are classic choices. The batter needs to be ice-cold for that signature crunch, so chill your beer and buttermilk for at least 30 minutes before mixing.
No lager beer? Substitute cold sparkling water—it adds the same lightness. Running short on buttermilk? Mix 1 tbsp lemon juice + 1 cup milk and let sit 5 minutes. For the dill dip, fresh dill is a must—dried won’t give that bright flavor. The coleslaw cabbage can be pre-shredded (the bagged kind saves time), but if using whole heads, a mandoline makes quick work of it. The hushpuppies? Cornmeal is key—don’t skip it for flour. And if you’re frying, peanut oil adds a nice nutty depth, but vegetable oil works in a pinch.
Keep the fish batter covered in the fridge for up to 4 hours—it gets better as it rests. The dill dip stays fresh for 3 days in the fridge, but the flavor peaks after 12 hours. Hushpuppies reheat best in a 350°F oven for 10 minutes—they lose crispiness fast. For the coleslaw, add vinegar just before serving to keep it crunchy. Double the batter if you’re feeding a crowd—it’s that good.
Why You'll Love This Recipe
- No Beer? No Problem: The cold lager isn’t just for flavor—it’s the secret behind that golden, crispy crust. But here’s the kicker: if you’re fresh out, buttermilk alone does the job just as well. I’ve tested it both ways, and honestly? The difference is subtle enough that I’d never stress over it.
- Crispy-Creamy Magic: That first bite—crunchy exterior, tender fish—is what makes this worth repeating. The buttermilk marinade keeps the cod and haddock juicy while the beer-infused flour creates a crust so good, my kids ask for seconds before I even finish plating. (Yes, even on a Tuesday night.)
- Weeknight Wonder: This isn’t a fussy dinner. You’re looking at 20 minutes from start to finish—no brining, no complicated prep. Just flour, beer, buttermilk, and fish. I’ve made it for date nights, lazy Sundays, and even as a last-minute side for a crowd. It’s my go-to when I don’t want to think too hard.
- Leftovers? Better Than Fresh: The best part? The fish holds up like a champ. Reheat in a skillet or oven, and it’s just as crispy as the first time. I’ll be real: I’ve eaten this for lunch the next day without a second thought. Plus, the beer-buttermilk batter makes it feel special enough to serve guests—even if it’s technically leftovers.
Step-by-step instructions for Andy's fish fry copycat recipe
Here's how to recreate Andy's legendary crispy beer-battered fish at home.
Prepare the Beer-Battered Fish
In a large bowl, whisk together the 2 cups all-purpose flour, 1.5 teaspoons salt, and 0.5 teaspoon ground black pepper. Make a well in the center and pour in the 1 cup cold lager beer and 1 cup buttermilk. Stir gently until just combined—you want a thick, lumpy batter, not a smooth liquid.
In a separate bowl, beat the 2 whole large eggs until frothy. Dip each 1-inch piece of fresh cod and haddock fillets first into the egg mixture, allowing excess to drip off, then coat thoroughly in the beer batter. Let the coated fish rest for 5 minutes on a wire rack—this helps the batter adhere better and creates that signature crispy crust.
Fry to Golden Perfection
Heat 4 cups vegetable oil in a deep fryer or heavy pot to 360°F. Use a candy or deep-fry thermometer to monitor the temperature—it should stay steady between 350-375°F. Fry the fish in batches for 3-4 minutes until golden brown and crispy. Don't overcrowd the fryer or the oil temperature will drop, making the fish greasy instead of crispy.
Transfer the fried fish to a paper towel-lined plate to drain excess oil. Keep the oil hot for the cornmeal hushpuppies—you'll use the same batch. Real talk: the first batch might not be perfect, but you'll get the hang of it. The secret is maintaining that oil temperature like your life depends on it.
Make the Tangy Dill Dip
In a medium bowl, combine the 1 cup mayonnaise, 0.5 cup sour cream, 0.5 cup chopped fresh dill, 2 tablespoons lemon juice, 1 teaspoon salt, and 0.25 teaspoon black pepper. Mix until smooth and creamy. Taste and adjust seasoning—you want bright, tangy, and just slightly sweet. This dip should be cool and ready to serve immediately alongside the hot fish.
Here's the thing—don't rush the mixing. The dill needs to be finely chopped and evenly distributed for that signature Andy's flavor. If it looks too thick, add a teaspoon of cold water to loosen it slightly. The dip should coat the back of a spoon but still hold its shape.
Prepare the Cornmeal Hushpuppies
Mix the 0.5 cup cornmeal with 0.25 cup all-purpose flour, 0.5 teaspoon salt, and 0.25 teaspoon black pepper in a bowl. In another bowl, whisk 1 whole large egg with 1 tablespoon cold beer. Combine the wet and dry ingredients, stirring until just mixed—don't overwork it or the hushpuppies will be dense.
Drop heaping tablespoon-sized mounds of batter into the 360°F oil and fry for 2-3 minutes until deep golden brown and puffed. They'll look irregular—that's perfect! Drain on paper towels and keep warm in a 200°F oven while you finish frying.
Assemble the Coleslaw and Serve
Toss the 2 cups shredded cabbage with the 0.5 cup mayonnaise (for coleslaw) and 2 tablespoons white vinegar. Mix gently until just combined—you want the cabbage to stay slightly crunchy, not soggy. Let it sit for 10 minutes before serving to allow the flavors to meld.
Arrange the crispy fish, golden hushpuppies, and fresh coleslaw on a platter. Serve immediately with extra tangy dill dip on the side. The fish should be crispy outside with flaky, moist fish inside. If it's not perfectly crispy, fry it a few more seconds next time—don't walk away from that fryer!
Pro Tips For Making Andy'S Fish Fry Copycat
- Dry the Fish Like Your Life Depends on It: I learned this the hard way—wet fish won’t crisp. Pat those fillets thoroughly with paper towels, even if they look dry. The buttermilk coating needs a clean surface to stick, and soggy spots ruin the whole batch.
- Use Lager Beer That’s Actually Cold: This isn’t just about temperature—it’s about the beer’s bite. Chill that lager all the way (think fridge-cold, not just room temp) so it doesn’t dilute the batter. Warm beer makes for a flatter, weaker crust. Trust me, your taste buds will notice.
- Don’t Overcrowd the Fryer: I used to toss in every fillet at once, thinking I’d save time. Big mistake. The oil temp drops, and you end up with greasy, unevenly cooked fish. Fry in batches—even if it takes longer—so the oil stays hot and the crust forms properly.
- Rest the Battered Fish for 10 Minutes: Sounds weird, but it works: Let the beer-buttermilk-battered fillets sit on a wire rack for 10 minutes before frying. This lets the coating firm up, so it doesn’t fall apart when you flip. (Yes, even if you’re impatient like me.)
Pro cooking tips for this recipe
Batter Consistency
The beer batter should be thick and lumpy, not runny—think pancake batter consistency. I whisk the 2 cups flour with salt and pepper first, then create a well in the center.
Pour in the 1 cup cold beer and 1 cup buttermilk gradually while stirring gently with a wooden spoon. The batter needs to cling to the fish pieces but not drip off.
If it's too thin, add 1-2 tablespoons more flour; if too thick, a splash of cold beer helps. 🥄
Frying Temperature
Use a deep-fry thermometer—this is non-negotiable. Maintain oil at 360°F for the fish and hushpuppies. If the oil drops below 350°F, the batter absorbs oil instead of crisping. I use peanut oil for its high smoke point and subtle flavor, but vegetable oil works too.
Test the temperature by dropping a small piece of batter in—if it sizzles immediately and floats, it's ready. 🌡️
Double-Dipping Secret
For extra-crispy fish, I do a double-dip: coat the fish in egg, then beer batter, let it rest 5 minutes, then dip it in egg and batter one more time.
This creates a dual-layer crust that stays crispy even after resting. The first dip helps the batter adhere; the second adds that restaurant-quality crunch. 💡
Oil Management
Never fry more than half the pan’s capacity—overcrowding drops oil temperature and makes the fish greasy. I use a slotted spoon to transfer fish to paper towels immediately after frying.
Keep the oil hot for hushpuppies, but wipe the pan clean between batches to prevent flavor transfer. A fine-mesh strainer helps filter out food particles between uses. 🍳
Hushpuppy Shape
Use a large spoon or ice cream scoop to portion hushpuppy batter—this ensures even cooking. Drop them 1 inch apart in the oil so they don’t stick together. They’ll puff up and look irregular, but that’s perfect!
Fry until deep golden brown (not pale yellow) for maximum crispiness. Keep them warm in a 200°F oven while you finish the rest. ⏰
Dip Flavor Balance
The dill dip needs three key flavors: creamy (mayo + sour cream), bright (lemon juice), and herby (fresh dill). I pulse the dill in a food processor for 2 seconds to avoid bitterness, then mix it into the mayo base.
Taste as you go—add more lemon for tang or a pinch of sugar to balance. The dip should be cool and smooth, not grainy. 🌿
Nutrition facts
Frequently asked questions
Can I use frozen fish instead of fresh for this recipe?
Fresh fish is ideal for the best texture, but you can use frozen fillets if needed. Thaw them completely in the refrigerator overnight, then pat dry thoroughly before cutting into pieces. Never thaw at room temperature, as this can make the fish mushy. For extra insurance, let the thawed fish sit on paper towels for 10 minutes to remove excess moisture before dipping in batter.
What's the best beer to use if I don't have lager?
Use a light, cold beer with minimal flavor—Bud Light, Coors, or Miller Lite work perfectly. If you're completely out of beer, substitute with cold sparkling water (like club soda) mixed with 1 tablespoon lemon juice to mimic the acidity. The key is keeping the liquid ice-cold for that signature crispy texture. Avoid dark beers or ales, as they'll alter the batter's flavor.
How do I keep the fish crispy after frying?
The secret is twofold: double-dipping (egg then batter, rest, then egg and batter again) and serving immediately. Transfer fried fish to a wire rack set over a baking sheet to allow air circulation—this prevents sogginess. If you must hold the fish, keep it in a 200°F oven for no more than 10 minutes. The hushpuppies also lose crispiness fast, so fry them fresh and serve right away.
Can I make the dill dip ahead of time?
Yes, but with a caveat: make it 12 hours ahead for best flavor development, but don't mix the lemon juice until just before serving. Store all components separately in the fridge—mayo, sour cream, dill, and lemon juice. When ready to serve, combine everything and let sit for 30 minutes to allow flavors to meld. The dip keeps for 3 days in an airtight container.
What if my hushpuppies turn out greasy instead of crispy?
Greasy hushpuppies usually mean the oil wasn't hot enough (350°F minimum) or they were overcrowded in the fryer. For next time, use a deep-fry thermometer and fry in small batches with at least 1 inch between each piece. Also ensure your batter isn't too wet—it should hold its shape when dropped from a spoon. If they're still greasy, try frying at 375°F for 1-2 minutes longer.