Beverages
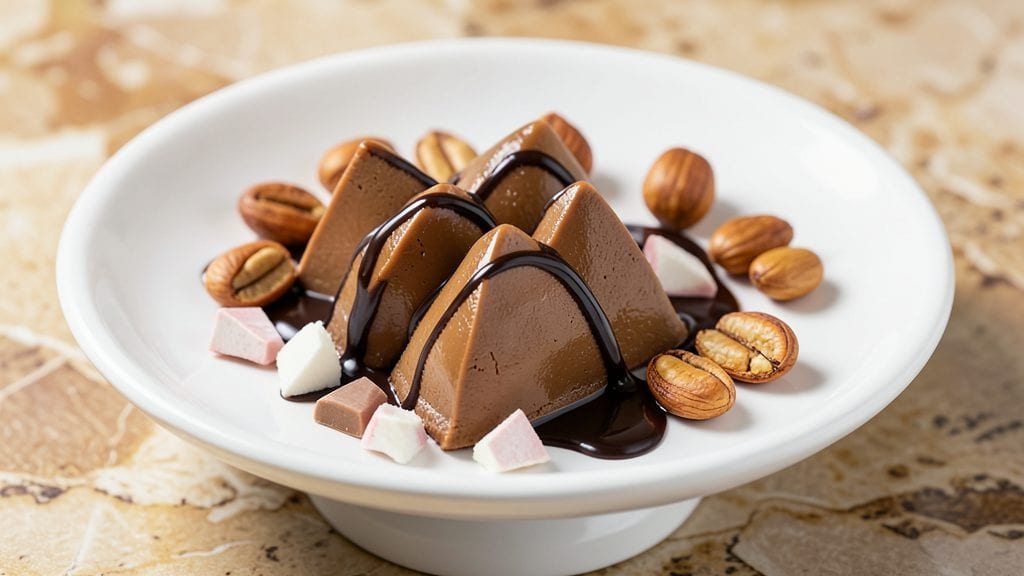
This milk truffle recipe delivers restaurant-quality dark chocolate ganache with a velvety vanilla infusion that transforms simple ingredients into luxurious bites. The secret lies in precise temperature control and slow cooling—technique matters just as much as the ingredients.
I’ve refined this recipe over years of trial and error, ensuring each truffle has that signature crack and melt-in-your-mouth texture.
The process begins with a silky dark chocolate ganache, where heavy cream and butter combine to create a glossy, foolproof base. A touch of vanilla bean elevates the flavor profile, while optional milk chocolate dipping or crushed nuts add texture contrast.
What sets these apart is the patience required—they need time to set properly, but the result is worth every minute.
By the time you’re done, you’ll have professional-grade truffles with a velvety interior and a snap-worthy shell. Dust them with cocoa powder or roll them in toasted nuts for an elegant finish. These truffles are perfect for gifting, special occasions, or indulging yourself—because sometimes, dessert deserves this level of attention.
Ready to master the art of chocolate ganache? Let’s turn your kitchen into a truffle-making studio with this step-by-step guide. The tools you need are minimal, but the results will impress even the most discerning chocolate lovers.
Ingredients for milk truffle
Twelve ingredients transform into luxurious milk truffles with velvety ganache and signature snap-worthy shells.
| Ingredient | Amount | Notes |
|---|---|---|
| Dark Chocolate Bars 🍫 | 16 oz | 70% cocoa, chopped into pieces |
| Heavy Whipping Cream 🥛 | 1 ¼ cups | Full-fat, room temperature |
| Unsalted Butter 🧈 | ½ cup | European-style preferred |
| Vanilla Bean 🌿 | 1 whole | Madagascar or Tahitian preferred |
| Milk Chocolate Bars 🍫 | 8 oz | For dipping, optional |
| Toasted Hazelnuts 🥜 | ½ cup | Crushed, optional garnish |
| Cocoa Powder 🍫 | ¼ cup | Dutch-processed, for dusting |
| Granulated Sugar 🍚 | 1 tbsp | For adjusting sweetness |
| Salt 🧂 | ¼ tsp | Fine sea salt |
| Alcohol (Optional) 🍷 | 1 tbsp | Brandy or rum, for moisture |
| Powdered Sugar 🍚 | ½ cup | For rolling truffles |
| Coconut Oil 🥥 | 1 tbsp | For coating molds, optional |
The chocolate selection is non-negotiable for professional results. Valrhona or Callebaut dark chocolate bars (70% cocoa) provide the ideal balance of richness and snap. Chop the chocolate into even pieces—no larger than 1-inch chunks—to ensure smooth melting. For the vanilla bean, Madagascar Bourbon or Tahitian varieties offer the deepest flavor profile. I source mine from Penzeys Spices or specialty chocolate shops, where they’re stored in airtight containers away from heat. The butter should be European-style—Plugrá or Miyoko's brands have higher fat content for a silkier texture. Pre-chop all chocolate and measure ingredients precisely; this recipe demands attention to detail for that restaurant-quality finish.
Substitutions are possible but require adjustments. 60% cocoa chocolate will yield a sweeter ganache, but reduce the granulated sugar by half. No vanilla bean? Pure vanilla extract at half the quantity works, though the flavor won’t be as complex. For the milk chocolate dipping, Ghirardelli or Lindt are reliable choices—avoid compound coatings. If you’re avoiding alcohol, omit it entirely; the truffles will still set, though they may dry out slightly faster. For the nuts, toasted pecans or almonds are excellent alternatives. The powdered sugar coating can be swapped for finely ground cocoa powder or even crushed freeze-dried raspberries for a fruity twist. Always taste the ganache before shaping—adjust sweetness with the granulated sugar if needed.
Temperature control is critical for perfect truffles. The ganache must cool to 80°F before shaping to prevent melting. Store shaped truffles in an airtight container between layers of parchment paper for up to 1 week at room temperature. For longer storage, freeze uncoated truffles for 3 months—thaw at room temperature before serving. The cocoa powder and powdered sugar coatings should be sifted to avoid clumping. Work in a cool kitchen; humidity can cause the ganache to sweat. For gifting, package truffles in cellophane bags with ribbons—they’ll keep for 5 days at room temperature if sealed properly.
Why You'll Love This Recipe
- No-Fuss Ingredients: I keep a stash of dark chocolate bars and heavy cream in my pantry anyway—this recipe just repurposes what’s already there. Honestly, the only measuring I do is eyeballing the vanilla scrapings and butter, which takes less time than scrolling through my phone.
- Velvet Cream Meets Crunch: That first bite of warm milk chocolate shell cracking into the silky, vanilla-kissed cream filling? It’s the kind of contrast that makes you pause mid-chew. Between us, the dark chocolate chunks in the center take it from "good" to "I’ll make this again tomorrow."
- Date Night or Snack Attack: I’ve served these at holiday parties (they disappear fast) and as a 10-minute dessert when my partner walks in the door. They’re fancy enough for company but so easy I’d make them on a Tuesday night—no one will question why.
- Make-Ahead Magic: I double the batch and store them in the fridge for up to a week. The flavors actually deepen over time, and they’re ready to grab for a last-minute gift or a coworker’s birthday. Plus, the cost per truffle is laughably cheap when you buy chocolate bars in bulk.
Step-by-step instructions for silky dark chocolate ganache with vanilla infusion
Mastering this technique transforms simple ingredients into luxurious truffles with perfect texture and depth.
Create the Vanilla-Infused Cream
Split the whole vanilla bean lengthwise and scrape out the seeds using the back of a knife. Combine the seeds with the 1.25 cups heavy whipping cream in a medium saucepan over medium-low heat. Heat until the cream reaches 180°F—just before it simmers—but never boil. This gentle heat extracts maximum vanilla flavor without cooking the cream.
Remove from heat immediately and let steep for 15 minutes covered. The cream should develop a rich, fragrant aroma. Strain through a fine-mesh sieve to remove any vanilla bean fragments, then return the infused cream to the saucepan. This step ensures a smooth, velvety texture in your ganache without any graininess.
Temper the Chocolate for Perfect Ganache
Chop the 16 oz dark chocolate bars into small, uniform pieces. Place 0.5 cup unsalted butter in a heatproof bowl and set it over a pot of barely simmering water (double boiler method), ensuring the bottom doesn't touch the water. Pour the infused cream over the butter in a slow, steady stream while whisking continuously.
Let the mixture sit for 1 minute to allow the butter to melt completely. Then whisk vigorously until the chocolate melts completely and the ganache reaches a glossy, 110-115°F temperature. The ganache should coat the back of a spoon smoothly—this indicates proper emulsification. If you add the cream too quickly, the mixture may seize; patience here prevents grainy texture.
Incorporate Flavor Enhancers
Remove the ganache from heat and stir in the 1 tbsp granulated sugar and 0.25 tsp salt until fully dissolved. Add the 1 tbsp alcohol (if using) and whisk for 30 seconds—this step prevents sugar crystallization and adds subtle depth. For extra richness, whisk in the 0.25 cup cocoa powder until completely smooth. The mixture should now be silky, with a deep chocolate aroma and no visible particles.
Let the ganache cool to 90°F while you prepare your work surface. This temperature is ideal for rolling—too hot and it will be too soft; too cool and it will set prematurely. If you notice any skin forming on the surface, simply whisk to redistribute the fat and restore smoothness.
Shape and Chill the Truffles
Line a baking sheet with parchment paper and dust lightly with 0.5 cup powdered sugar. Using a piping bag fitted with a ½-inch round tip, pipe the ganache into 1-inch diameter mounds, spacing them 1 inch apart. For a more rustic look, use a spoon to drop rounded dollops instead of piping. Immediately roll each mound in the powdered sugar to create a smooth, glossy exterior—this prevents sticking and adds professional presentation.
Transfer the truffles to the refrigerator and chill for at least 4 hours, or until completely firm. The center should still have a slight give when pressed gently with your finger—this indicates proper setting without being overly hard. For extra indulgence, dip the bottoms of chilled truffles in melted 8 oz milk chocolate bars before returning them to the fridge to set.
Garnish and Serve
Once fully set, roll each truffle in the 0.5 cup toasted hazelnuts for added texture and crunch. For an elegant finish, dust with additional cocoa powder or a light coating of the 1 tbsp coconut oil to enhance shine. Serve at 65°F for optimal texture—warmer temperatures soften the truffles too quickly, while colder temperatures make them brittle.
These truffles should have a smooth, velvety texture with a perfect balance of sweetness and bitterness. The vanilla infusion adds floral complexity, while the toasted hazelnuts provide a satisfying contrast. Store in an airtight container between layers of parchment paper for up to 1 week at room temperature, or freeze for up to 3 months for longer storage.
Pro Tips For Making Milk Truffle
- Temper the cream: Heat the heavy whipping cream over medium-low—just until it’s steaming, not rolling like a boiling pot. I learned this the hard way: once I let it boil, and the truffles turned grainy and separated like a sad fondue. Keep it at 160°F (70°C) max, or the butter will seize up later.
- Scrape the vanilla: Split the vanilla bean lengthwise and scrape out every last bit of those tiny black seeds—don’t just slice it and toss it in. Those seeds are where the magic lives. I used to skip this, and the flavor was always just okay. Now? It’s the thing that makes people ask, “What’s in this?”
- Chill the mixture: Let the chocolate-cream mix cool to room temp before adding the butter. Cold butter cuts cleanly and won’t turn your ganache into a greasy mess. I know, it’s tempting to rush, but trust me—this is the step that keeps your truffles from turning into chocolate pudding.
- Roll them small: Use a 1-tablespoon scoop (or a melon baller) and roll the truffles into 1-inch balls—no bigger. Oversized ones stay gooey inside and crack when they hit the fridge. Also, smaller truffles brown faster when baking (if you’re doing that), and they’re easier to dip in chocolate later. Less mess, more control.
Storing and reheating your milk truffle
Room-Temp Storage
Store your freshly made milk truffles in an airtight container between layers of parchment paper to maintain their shape and prevent sticking. I use glass containers with snap-on lids—they’re sturdy and don’t absorb odors.
Keep them at room temperature (68-72°F) for up to 5 days, but avoid direct sunlight or heat sources like the stove. The powdered sugar coating helps preserve moisture, but truffles may lose their gloss over time.
For extra freshness, place a small silica gel packet in the container to absorb any excess humidity. 💫
Refrigerator Freshness
If you’re planning to enjoy your truffles within 1-2 weeks, refrigeration is your best option. Place them in the same airtight container on the middle shelf (not the door) where temperatures stay consistent around 40°F. The cold slows down fat oxidation, keeping flavors vibrant.
When ready to serve, let them sit at room temperature for 10-15 minutes to soften slightly—this restores their velvety texture. I avoid refrigerating truffles longer than 2 weeks because the cocoa butter can start to separate. 🥛
Freezer Preservation
For long-term storage, freeze your truffles uncoated (without nuts or chocolate dipping) to prevent freezer burn. Place them in a single layer on a tray and freeze for 1 hour before transferring to a freezer bag with all air squeezed out.
Label with the date—they’ll keep for up to 3 months at 0°F. To thaw, transfer the bag to the refrigerator for 4-6 hours before serving. Never microwave or use hot water to speed up thawing, as this can cause the ganache to sweat and lose its structure. ❄️
Reheating Tips
Truffles aren’t meant to be "reheated" in the traditional sense—they’re best enjoyed at room temperature for their signature snap and melt. If stored in the fridge, let them warm for 10-15 minutes before serving.
For a quick texture boost, place the container in a bowl of warm water (110°F) for 2-3 minutes—this gently raises the temperature without melting the exterior. Avoid direct heat, as it can cause the chocolate to bloom (turn dull) or develop a grainy texture. 🔥
Reviving Dried Truffles
If your truffles lose their gloss or feel dry, don’t toss them! Place them in a single layer on a wire rack and set over a pot of simmering water (double boiler method) for 1-2 minutes. The steam will rehydrate the surface, restoring shine and snap.
For extra moisture, brush the tops lightly with melted coconut oil or a water-based glaze (mix 1 tbsp powdered sugar with 1 tsp water). Store them in an airtight container with a damp paper towel to prevent future drying. 💡
Gifting Like a Pro
For presentation, package truffles in cellophane bags tied with satin ribbons—they’ll stay fresh for 3-4 days at room temperature. Add a parchment paper divider between layers to prevent sticking. If gifting to someone with dietary restrictions, note any allergens (e.g., "Contains: Milk, Nuts").
For a luxurious touch, include a handwritten note and a mini chocolate spoon—it’s the little details that elevate the experience. These truffles make stunning gifts because they’re elegant, portable, and universally loved. ✨
Nutrition facts
Frequently asked questions
Why does my ganache turn grainy?
Graininess happens when chocolate and cream separate or cool too quickly. Always temper the chocolate by pouring hot cream over chopped chocolate (never melted chocolate over cream). Whisk constantly until smooth, then let it cool to 90°F before shaping. If it seizes, whisk in 1 tsp coconut oil or 1 tsp alcohol to re-emulsify.
Can I make these without a vanilla bean?
Use 1 tsp pure vanilla extract instead, but the flavor won’t be as complex. For depth, add ½ tsp vanilla bean paste** or a pinch of orange zest. The vanilla infusion is key to balancing the rich chocolate—don’t skip it entirely if possible!
How do I prevent truffles from sticking?
Dust your work surface and hands with powdered sugar or cocoa powder before handling. Roll each truffle immediately after shaping to create a smooth barrier. For extra insurance, chill the ganache slightly longer (10-15 minutes) before piping to firm it up. Store in an airtight container with parchment between layers.
What’s the best way to dip truffles in milk chocolate?
Melt 8 oz milk chocolate bars in a double boiler until 110°F, then dip the bottoms of chilled truffles for 2-3 seconds. Place on parchment paper to set (5 minutes). For a clean finish, use a fork to gently scrape off excess chocolate. Work quickly—milk chocolate hardens fast!
Can I make these truffles ahead of time?
Yes! Shape and coat truffles 1 day ahead for best results. Store in an airtight container at room temperature for 5 days or freeze uncoated truffles for 3 months. Thaw in the fridge overnight before serving. The flavors actually improve with time as the cocoa butter crystallizes properly.