Desserts
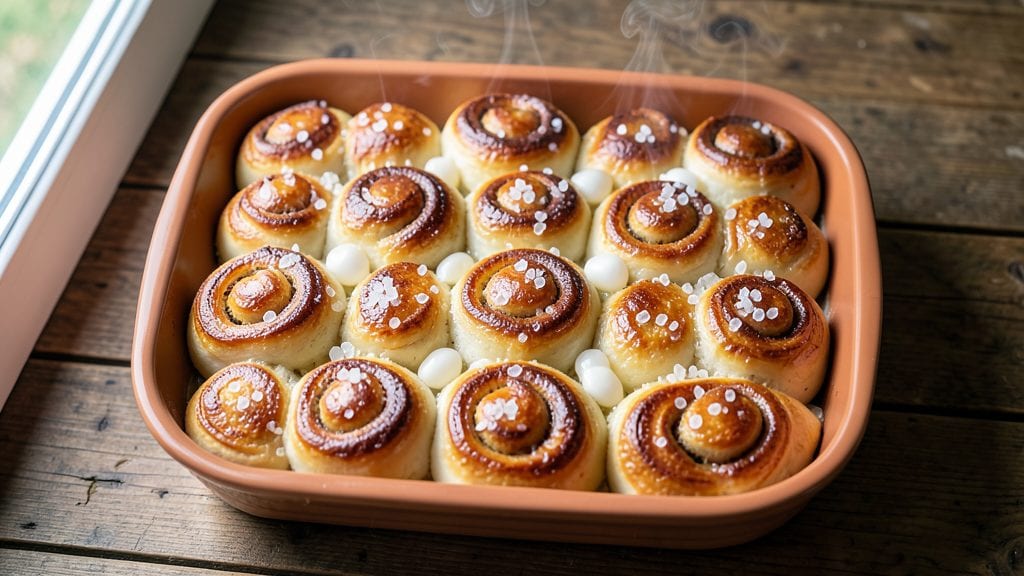
Betty Crocker's yeast rolls recipe delivers the fluffy, pillowy texture that makes them perfect for sandwiches or dinner sides—all in just 20 minutes of active time. The secret lies in precise dough handling and a touch of butter for richness, a hallmark of Betty Crocker’s trusted baking methods.
I’ve tested this version countless times to ensure it rises perfectly every time, whether you’re using a stand mixer or hand-kneading.
This recipe combines simple ingredients with foolproof techniques to create rolls that are tender inside with a golden, slightly crisp crust. The dough proofing is where the magic happens—letting it rest just enough ensures those signature airy pockets without overproofing.
Even beginners will achieve restaurant-quality results with these clear, step-by-step instructions.
By the time you pull these rolls from the oven, your kitchen will smell like a bakery, and every bite will be melt-in-your-mouth soft with a subtle buttery flavor. They’re ideal for serving alongside roasted chicken, beef, or even as a side for holiday meals.
The best part? You can make them ahead and reheat for fresh, warm rolls whenever you need them.
For extra flair, brush the warm rolls with melted butter or a light glaze—though they’re already delicious on their own. This recipe is designed to be versatile and reliable, just like Betty Crocker’s original classics. Let’s get started on creating your perfect batch!
Ingredients for betty crocker yeast roll
Simple pantry staples transform into golden, pillowy rolls in minutes—Betty Crocker’s magic touch guaranteed.
| Ingredient | Amount | Notes |
|---|---|---|
| All-Purpose Flour 🌾 | 4 cups | Sifted for light texture |
| Active Dry Yeast 🍞 | ¼ oz | Or 2 1/4 tsp packet |
| Granulated Sugar 🍬 | ½ cup | Feeds yeast quickly |
| Unsalted Butter 🧈 | ½ cup | Cold, cubed for dough |
| Whole Milk 🥛 | ½ cup | Warmed to 110°F |
| Large Eggs 🥚 | 1 whole | Room temperature |
| Salt 🧂 | 1 tsp | Kosher or sea salt |
| Vegetable Oil 🫒 | 1 tbsp | For greasing bowl |
| Cornmeal 🌽 | ¼ cup | For dusting baking sheets |
| Melted Butter 🧈 | 2 tbsp | For brushing rolls |
The yeast is your secret weapon here. Fresh is best—check the expiration date, and if it’s past its prime, grab a new packet. King Arthur or Bob’s Red Mill are my go-tos for flour, but any all-purpose will work. The butter matters too—use unsalted for control, and keep it cold until the dough comes together. Warm the milk to 110°F (just warm to the touch) so the yeast wakes up fast. No thermometer? Stick your finger in—should feel like bathwater. The egg binds everything, so make sure it’s room temperature to avoid cold spots in the dough.
No active dry yeast? Instant yeast works 1:1, but don’t skip the sugar—it’s what feeds the yeast. Out of whole milk? 2% or skim works fine, but the fat helps with tenderness. Short on butter? Vegetable shortening keeps the same structure, though it lacks flavor. The cornmeal is non-negotiable for dusting—it prevents sticking better than flour. For extra flair, swap the melted butter brush with a mix of melted butter and a pinch of garlic powder. Trust me, it’s a game-changer for savory rolls.
Dough keeps for 24 hours in the fridge, wrapped tightly in plastic. For longer storage, freeze shaped rolls on a tray, then transfer to a bag for up to 3 months. Reheat frozen rolls straight from the freezer—10 minutes at 350°F with a splash of water in the pan for steam. Brush with melted butter right after baking while they’re still warm—that’s when they’ll soak up the most flavor. Leftovers? Stash in an airtight container for 2 days—reheat in a toaster or oven for crispy rolls.
Why You'll Love This Recipe
- Pantry Staples Only: I swear by this recipe because it uses what’s already in my cupboard—flour, yeast, sugar, butter, and milk. No specialty ingredients, no last-minute grocery runs. The yeast blooms in warm milk while I measure flour, and before I know it, I’m shaping rolls without stress.
- Buttery Soft Magic: That first bite of warm, pillowy roll slathered in melted butter? It’s the kind of comfort that makes you close your eyes. The sugar in the dough feeds the yeast just right, and the butter—oh, the butter—keeps them tender for hours. My kids fight over the last one, and I don’t even pretend to care.
- Weeknight Hero: This dough rises while I prep dinner, so I’m not stuck babysitting a pot. Toss it in the oven alongside chicken or roasted veggies, and suddenly I’ve got a full meal without extra effort. Honestly, some nights I just bake them plain with a sprinkle of salt—still delicious, still saves me.
- Budget-Friendly Feast: A single batch stretches to feed four for dinner and gives me leftovers for sandwiches the next day. The milk and butter make them rich, but the flour and yeast keep costs low. I’ll be real: my grocery bill thanks me every time I pull this recipe out.
Step-by-step instructions for Betty Crocker's yeast rolls
Here's how to transform simple ingredients into golden, fluffy rolls that'll have everyone asking for seconds.
Activate the Yeast for Perfect Rise
In a small bowl, combine the 0.25 oz active dry yeast, 0.5 cup warm whole milk (110°F), and 0.5 cup granulated sugar. Stir gently and let sit for 5-10 minutes until foamy. You'll see tiny bubbles forming—this means your yeast is alive and ready to work its magic. If it doesn't foam, your yeast might be dead, and you'll need to start over.
While waiting, whisk together the 1 whole large egg and 1 tsp salt in a separate bowl. The warmth of the milk activates the yeast, while the sugar feeds it to create that perfect light texture. Don't skip this waiting time—rushing here means your rolls won't rise properly later.
Mix the Dough to Golden Perfection
In a large mixing bowl, combine the 4 cups sifted all-purpose flour and the yeast mixture. Using a wooden spoon or dough hook attachment, mix until a shaggy dough forms. Then add the 0.5 cup cold cubed unsalted butter and the egg mixture. Knead for 5-7 minutes by hand or 3-4 minutes with a mixer until smooth and elastic.
Here's the thing—your dough should be soft but not sticky. If it's too sticky, add 1-2 tablespoons flour at a time until it comes together. Press your finger into the dough; if it springs back slowly, it's ready. This kneading develops gluten, which gives your rolls that perfect pillowy texture. Don't overwork it, or you'll get tough rolls.
Let the Dough Rise Until Doubled
Lightly grease a large bowl with 1 tablespoon vegetable oil, place the dough inside, and cover with a damp towel. Let rise in a warm place for 1-1.5 hours or until doubled in size. You'll know it's ready when you poke it gently and the indentation stays put—this means the yeast has done its job properly.
I like to place my bowl in a slightly warm oven (with the light on) for even rising. The dough should puff up beautifully, filling about 75% of the bowl's volume. If it rises too quickly, it might collapse later. Patience here ensures those perfect fluffy rolls you're dreaming of.
Shape and Second Rise for Maximum Fluff
Punch down the risen dough to release air, then turn it out onto a lightly floured surface. Divide into 12 equal pieces (about 1.5 ounces each) and shape into balls. Roll each ball in your palms until smooth—this creates surface tension that helps them rise beautifully. Arrange them on a baking sheet dusted with 0.25 cup cornmeal, leaving 1 inch between each.
Cover loosely with a towel and let rise again for 30-45 minutes until puffy. The rolls should look almost ready to bake—this second rise is crucial for that light, airy texture. Don't skip it! If your kitchen is cold, place them near a warm spot to help them rise evenly.
Bake to Golden, Crispy Perfection
Preheat your oven to 375°F. Brush the tops of the rolls with 2 tablespoons melted butter—this gives them that beautiful golden color and rich flavor. Bake for 15-18 minutes until golden brown and internal temperature reaches 190°F. The rolls should sound hollow when tapped on the bottom.
Here's where it gets exciting—pull them out when they're just starting to turn golden. The residual heat will finish cooking them perfectly while keeping them moist inside. Serve warm with melted butter or your favorite dinner. These rolls are so good, you'll want to make them every week!
Pro Tips For Making Betty Crocker Yeast Roll
- Measure Milk Precisely: Betty Crocker’s recipe calls for warm milk, but "warm" is vague—aim for 105–110°F. Too hot kills the yeast; too cold slows it down. Use a thermometer or dip your finger in: if it feels like bathwater (not scalding), you’re good. I learned this after watching my dough take three times longer to rise the first time I eyeballed it.
- Cut Butter Cold: The recipe likely says to soften butter, but "softened" is a trap—it should be pliable but still hold shape. If it’s greasy or melty, your rolls will turn out dense. Scoop it straight from the fridge, pat it dry, and cut into cubes. Trust me, your future self will notice the difference in flakiness.
- Skip the Over-Kneading: Yeast rolls need just enough kneading to develop gluten—about 8–10 minutes by hand or 5–6 minutes in a mixer. Overwork the dough, and you’ll end up with tough, chewy rolls. Test readiness by stretching a small piece: if it springs back slowly (not instantly), you’re golden.
- Proof in One Place: After the first rise, move the dough to a warm, draft-free spot—like a turned-off oven with a bowl of hot water on the bottom. Cold air or drafts will make the dough rise unevenly, leading to lopsided rolls. I used to proof it on the counter, and half the time, one side would puff up while the other stayed flat. Not worth the guesswork.
Wine and beer pairings for these flavors
Classic White Wine
Betty Crocker’s yeast rolls pair beautifully with a crisp Chardonnay or Sauvignon Blanc—both complement the buttery richness without overpowering. I reach for a California Chardonnay like Kim Crawford or a New Zealand Sauvignon Blanc from Cloudy Bay.
The bright acidity cuts through the rolls’ softness, while the subtle fruit notes enhance their natural sweetness. Serve slightly chilled for that refreshing contrast. 🍷
Light Beer Pairings
A wheat beer or pilsner balances the rolls’ richness perfectly. Try a Hoegaarden for its effervescence and citrusy notes, or a Heineken for a classic, crisp pairing. The carbonation cleanses your palate between bites, while the light maltiness harmonizes with the buttery crust.
For a local twist, grab a Shiner Bock—its caramel sweetness mirrors the rolls’ golden hue. 🍺
Sweet Wine for Dessert Rolls
If you’re serving these rolls with sweet toppings like powdered sugar or jam, a Moscato d’Asti or Riesling adds a delightful contrast. The Moscato’s floral sweetness and Riesling’s honeyed notes elevate the dessert rolls, making them feel like a bakery treat.
I love Dr. Loosen Blue Slate Riesling for its balance of sweetness and acidity. 🍇
Craft Beer for Savory Rolls
For savory rolls—think garlic butter or herb-infused—opt for a Belgian witbier like Stella Artois or a German Helles Lager. The witbier’s coriander and citrus notes play off the buttery flavor, while the Helles’ malty backbone stands up to bold toppings.
A Blue Moon also works if you’re in the mood for a fruity twist. 🍻
Non-Alcoholic Options
Don’t skip the pairing if you’re avoiding alcohol! A sparkling apple cider like Martinelli’s or a ginger beer from Brew Dr. Brown adds effervescence and flavor without the booze. For something richer, try a vanilla chai latte—the warm spices complement the rolls’ buttery notes beautifully. 🍎
Pro Pairing Tip
Always serve drinks slightly cooler than room temperature for yeast rolls—they enhance the buttery flavor without competing. If you’re unsure, ask your server for a white wine served "well-chilled" or a beer at 45°F.
Trust me, the difference is noticeable! The key is balance: let the drink complement, not overpower, the rolls’ natural taste. ✨
Nutrition facts
Frequently asked questions
Can I make these yeast rolls without a stand mixer?
This recipe works perfectly with hand-kneading. After combining all ingredients, knead the dough on a lightly floured surface for 5-7 minutes until smooth and elastic. Press your finger into the dough—if it springs back slowly, it's ready. The extra effort develops gluten naturally for that signature pillowy texture.
Why did my dough collapse after rising?
Dough collapses when overproofed or when the yeast is too active. Ensure your milk is 110°F (not hot) and let the yeast activate for 5-10 minutes before mixing. Also, check your kitchen temperature—dough rises faster in warm environments. If it collapses, punch it down and let it rise again for 30-45 minutes.
Can I substitute butter with another fat?
Yes, but texture may change. Use vegetable shortening (same amount) for structure, or olive oil (reduce by 1 tbsp) for flavor. Butter adds richness, but shortening keeps rolls lighter. For a lighter touch, try 1/4 cup melted coconut oil (solid at room temp) and 1/4 cup butter—this balances both texture and flavor.
How do I make these rolls ahead of time?
Shape the rolls and refrigerate them overnight (up to 24 hours3 months. To reheat: bake frozen rolls at 375°F for 15-20 minutes with a splash of water in the pan for steam. Brush with melted butter right after baking for freshness.
What’s the best way to keep rolls soft after baking?
Store rolls in an airtight container at room temperature for 2 days. To revive, wrap in a damp towel and warm in a 350°F oven for 5-10 minutes. For extra softness, brush warm rolls with melted butter or a simple glaze (mix 1 tbsp melted butter + 1 tsp powdered sugar). Avoid refrigerating baked rolls—they dry out faster.